Documenting the transformation of a barn find into a cafe racer.

Latest

DIY Cross Drilled Rotor

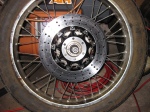
In keeping with the theme of working on the front end, it’s time to cross drill the rotor. Everyone seems to agree that you get much better performance with a cross drilled rotor, most notably when it’s raining. I was originally planning on sending the rotor out to be drilled, but what fun is that? After reading up on the SOHC forums about other people drilling their own rotors, I was pretty confident I was up to the task. I went out and picked up 2 Dewalt 1/4″ Cobalt drill bits from Lowe’s, and a bottle of 3-in-1 oil to use for lubrication. I also grabbed a Hitachi 3/8″ Titanium countersink bit, which proved to be a mistake, but more on that later.

I downloaded a drilling template that I found in one of the threads on the SOHC forums and printed out a few copies. The template was too big for the page, so I had to align 3 of them together to cover the entire rotor. With the template taped down, I went around and center punched all 60 holes, then removed the template.

I setup my drill press with the 1/4″ bit, put a drop of oil on the first mark, and started drilling. I went pretty slow at first, not knowing how well the bit was going to cut. I backed the bit out a few times, each time adding a drop of oil into the hole. I won’t lie – it was a relief to get the first hole drilled with out any catastrophes. No broken bit, no cracked rotor, no spontaneous combustion. So far, so good. The drilling went faster once I developed a feel for the process, and the bit was holding up well. At one point about 1/4 of the way around the rotor, I noticed on of the 3-hole rows was slightly misaligned. I initially thought this was an artifact of misalignment when I laid out the templates, but shortly after I discovered that the drill bit was starting to wander off the center punch marks when starting the holes.

Once I noticed the problem, I started paying closer attention and was able to finish the rotor without any more alignment issues. If I had to do it over again, I think I would start each hole with a smaller bit, which I’m assuming would be a little easier to align to the center punch marks. Overall, the pattern came out looking pretty good, and you really can’t notice the misaligned row when the rotor is on the wheel.

After drilling all the holes, I moved onto chamfering the edges with the countersink bit. The bit made it through about 30 holes before crapping out, at which point it just started burring the edges of the holes even more. Unfortunately, it took me quite a few holes before I noticed that I was doing more harm than good. Well, I learned from my mistake, and ordered a new cobalt countersink bit from Amazon. Once the new bit comes in I’m pretty sure I can clean up the rest of the holes, reverse any damage the dull bit may have done, and be left with a functional (and stylish) cross drilled rotor.

Cleaning the Front Forks

After modifying the front fender, I was eager to keep working on the front end. The corroded forks were an eyesore, but I knew there was some shiny metal hiding under there somewhere. I received the new fork seals the other day, so after running to the store and picking up some supplies, I was ready to get started.

With the bike on the center stand, I placed a piece of wood between the jack and the sump, and pumped the jack a few times to lift the front tire about an inch off the floor. I removed the front wheel and set it aside, then loosened up the filler caps on each fork. I was happy to find that, after loosening up the clamps on the upper and lower yokes, the forks slid right out with little effort.

I drained the fluid out of one fork, then set it on the workbench and began dismantling. When I got the fork apart, I noticed that it didn’t match the CB550 fork diagram in my Haynes shop manual. According to the manual, it looks like these may be CB450F forks. The jury is still out on this, since it seems that Honda used 3 different types of forks on the CB550’s. At the time, I decided to just follow the what the manual said for the CB450F forks.

Cleaning up the forks was a laborious project. I started by wet sanding with medium grit paper and copious amounts of WD-40, which worked like a charm. Once all the visible corrosion was gone, I went over the entire surface 3 more times with decreasing (increasing?) grades of steel wool – again lubricating with WD-40. Once all the discoloration was removed and I was happy with the finished, I moved onto polishing with some Mother’s Mag Polish. The end result was nothing short of amazing! I really couldn’t believe how well they cleaned up – the pictures don’t do it justice.

After cleaning the fork, I replaced the seals, refilled with some ATF (per the Haynes manual) and reassembled. That process took 1 sentence to describe, but about 2 hours to complete… After I reassembled both forks, I could detect a noticeable difference in their responsiveness, enough so that I drained, disassembled, inspected, reassembled, and refilled both forks. Thankfully they felt better the 2nd time.

That was enough fun for one day. I think I may polish & buff the fork stanchions a bit more, but for now they look much better than they did before.

Cutting Down the Front Fender – Now with Bacon! (Slicer)

It took me a while to decide what I wanted to do with the front fender. The original fender was chrome, but it was in pretty rough shape. I did know 2 things for sure: I wanted a smaller-than-stock fender, and I wanted a front plate (pedestrian / bacon slicer) on it. For a while I was planning on ordering a fiberglass fender, but I decided that it would be more fun to modify the original fender to suit my needs.

I decided to leave the front edge of the fender stock and chop off a few inches from the rear. I made a template using the curvature of the front edge as a guide, and traced the line onto the rear of the fender. I then fitted my Dremel with a cutting disc and got to work. The cutting went pretty smoothly, although I did spend a bit of time getting the curves on each edge to match.

I’m still trying to decide if I want to apply any finishing touches to the chopped edge. The original fender is rolled around the edges, so there is a discontinuity on the edge that I cut off. I’ve come up with 3 possibilities:

  1. Leave it as-is
  2. Bend some round bar to match the rolled edge and weld it to the fender
  3. Cut the rolled edge off the front of the fender to match the back edge

After chopping the fender, I moved on the front plate. I had picked up a nice vintage front plate off eBay a few months ago that I intended on mounting on the Bonneville, but I decided that it would look better on this bike. The front plate was secured by 2 bolts, so mounting was pretty straightforward.

Overall, I’m happy with how the front end is shaping up. It’ll look even better once I get the fork boots on there!

Spending Spree!

After much research and debate, I decided it was time to order some parts. Here’s what made it into the first round of purchases:

Dismantling the Brake Caliper

In preparation for ordering parts, I dismantled the front brake caliper to see what I would need. After removing the caliper from the wheel, I started pumping the brake to work the piston out. Unfortunately, I wasn’t keeping an eye on the fluid level in the master reservoir, and it ran dry before the piston came out. I added some more fluid and tried bleeding the brakes for a while, but I wasn’t having much luck with that approach. I ended up disconnecting the brake line from the caliper, and used the air compressor to pop out the piston. Luckily I had read a few reports of other people using this approach, so I knew what to expect… After blowing some air in there for a second, the piston shot out with a good amount of force, right into the plastic bucket I was aiming it at. Having your finger in the way of the piston could definitely ruin your day.

The piston was in decent shape, save a few pitted spots. It would probably be fine to use, but to be safe I think I’m going to pick up a new phenolic one off eBay. The caliper was a little rusted inside, but it looks like it will clean up without too much trouble.

Sorry, no pictures – forgot to bring the camera with me.

Starting it up for the first time…

Milestone 1: Getting it running

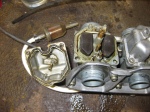
I spent 2 nights cleaning up the carbs, using a combination of Zap citrus cleaner, carb cleaner, a toothbrush and Q-Tips.  The Zap worked really well at loosening up the old varnish and globs of gasket sealer that was all over the place.  While I was working on cleaning out the bowls, I left the main jet and idle needle soaking in a cup of carb cleaner.  Each carb required a few treatments of Zap to get them spotless, rinsing with water and blowing out with compressed air in between.

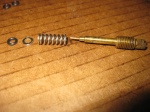
After removing the idle screws, and doing a bit of research, I realized that whoever had previously assembled the carbs did so incorrectly.  The assembly is supposed to have an o-ring at the bottom, followed by a small washer, then a spring.  The current assembly consisted of a spring followed by an o-ring, and no washer.  I didn’t want to order the washers, as it would take a few days, so I tried the local hardware store.  They didn’t have anything that small, so, per their suggestion, I went to Radio Shack next.  I got a bag full of assorted small washers for $2.  None of the assorted sizes were exactly what I needed, but there was one that had the proper inside diameter.  Long story short, I used my Dremel and a file to reduce the washers to the proper outside diameter, and they worked out perfectly.

Once I got the carbs cleaned and the floats adjusted, I reassembled the carbs using the new o-rings.  Unfortunately, the new gaskets for the top cover of the carbs were slightly different than the old ones, so they didn’t fit.  The old ones were still in good shape, so I just left them on there. Next, I set up the tank on my workbench and flushed out the carbs with some clean gas.  Once I was satisfied that the fuel was flowing freely and the carbs weren’t leaking, I reinstalled them on the bike.

After reinstalling the carbs, I changed the plugs and the oil, and installed a new oil filter.  Then it was time to try starting it up.  I hooked up the jump box (still no battery) and set up the gas tank (with the new fuel line and filter) and started cranking.  It took a little while, and some messing around with the choke, but eventually it started.  Awesome.  It was firing pretty strong on 3 cylinders, but the 4th was sputtering a bit.  At this point it was pretty late, and I had to get up early, so I didn’t mess around with adjusting the carbs.  But, it was running! Milestone 1 complete!

Removing the carbs, take two

After my failed effort at pulling the carbs the other day, I did some research and discovered my mistake.  I had loosened up the hoses that connect the carbs to the engine on both the engine side and the carb side.  Apparently you only want to loosen them on the carb side.  Once I tightened up the hose clamps on the engine side, the carbs came loose with minimal effort.  Unfortunately, getting the carbs loose was the easy part – getting them out is another story.

I should mention that, prior to removing the carbs, I had already disconnected the throttle and choke cables from the carb assembly, as well as the air intake hoses.  I also had drained the stagnant fuel from each of the bowls.

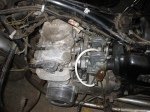
There isn’t much wiggle room between the engine, the carbs, and the air box.  This makes actually removing the carbs a pretty tight fit.  Luckily, the air intake hoses bend pretty easily, so, with a bit of work and patience, I finally got the carbs free.  I brought the carbs over to the workbench and, expecting the worst, removed one of the bowls.  To my surprise, it didn’t look too bad.  I didn’t go too crazy with disassembly, but with a little cleaning I was able to get the main jet cleared out.  My main purpose was to inspect the overall condition to determine what parts I needed to order.

I went back and forth for a while between just ordering new float bowl gaskets ($17) or the entire gasket set ($56).  The float bowl gaskets definitely needed to be replaced, but I wasn’t sure about the other ones.  After an hour of contemplation, I decided to err on the side of caution and order the full gasket set.  While I was at it, I also ordered new plugs (NKG-D7EA), oil filter, fuel filter, and fuel line.

Work on the carbs is at a bit of a standstill until the new gaskets come in, but I was having fun, so I decided to pull off some more parts.  First to come off were the highway bars, followed by the sissy bar and rear fender.  All in all, a productive couple hours.

Let the teardown begin!

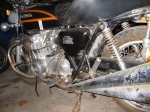
I had an hour to kill after dinner today, so I thought I’d start removing some parts from the bike.  I started by pulling off the seat and then tank, then moved on to pulling apart the air box.  All those went pretty quick, so I decided to try pulling off the carbs.  After struggling with them for 20 minutes, I ran out of time and had to leave it for another day.

After removing the seat and the tank.

Day Zero: A few more pictures